While the Nexcopy SSUSB160PC duplicator is not without its minor flaws, for the most part, it will be a real productivity enhancer. Just remember your results will only be as good as the flash drives you use.
May 2011 Anthony Garland
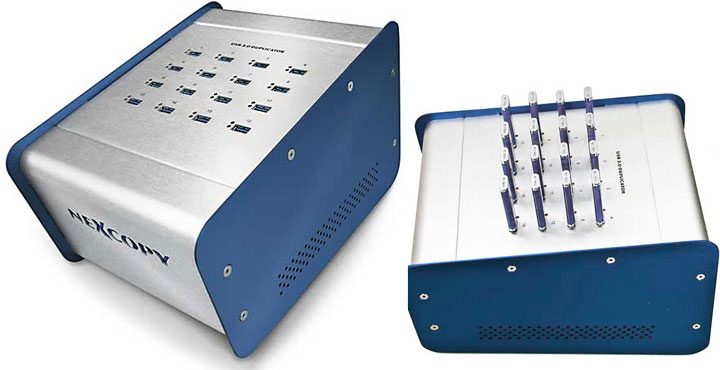
The Nexcopy USB 3.0 Duplicator (SSUSB160PC) primarily targets an interesting niche market with a demand to mass copy a number of flash drives in a short period of time. In fact, the Nexcopy is an industrial tool that can churn out 16 unique flash drive images at a time. This may not sound like a big deal for the average user, but if you have ever spent time doing this one by one, then you know how much time you can save in the long run. This assumes it works as advertised that is. Now, let’s find out together if the 16-port duplicator is hyper-good or just hype.
Lots of USB 3.0 Ports
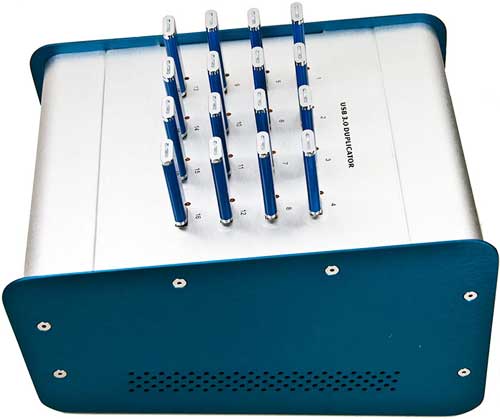
If you have never seen – let alone used – a flash drive cloning device / imager, then the USB 3.0 duplicator from Nexcopy may seem shall we say a tad odd looking. With its dimensions of 29.8 x 20.5 x 19cm and weighing in at a robust 5.3 pounds, this certainly is not a peripheral you want to be moving around on a regular basis. Rather it is the kind of essential tool (like a plotter or large enterprise-class laser printer) that you will want to set up on one system and leave it there. The bigger design of the box does yield to a more stable device as the user goes through a repetitive cycle of connecting / disconnecting drives. So what seems “odd-looking” at first, ends up being an asset to function.
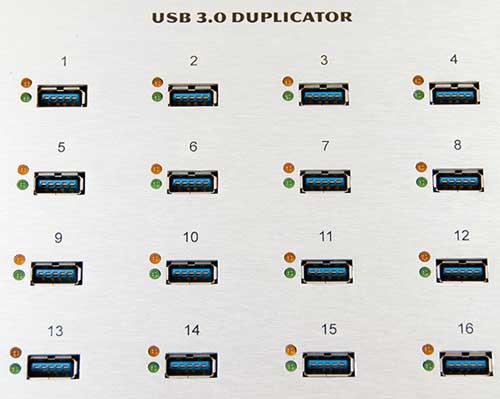
As far as USB duplicators go, the Nexcopy SSUSB160PC is actually pretty stylish. Its form certainly flows from its function, but Nexcopy has made it look in a German-engineered car sort of way. Because of this form from function design, it is rather rectangular with flat boxy sides. However, Nexcopy did add in some flare where they could. For example, having the top slope downwards from back to front does give it a more aggressive styling. This dash of styling does make it even more functional as sticking in the 16 flash drives into the 16 USB 3.0 ports on that self-same top is actually easier when they are slightly offset in the vertical plane. It’s also a lot easier to check all 32 status lights for the 16 ports (red for bad, green for good).
Where the Nexcopy USB 3.0 duplicator is a serious tool meant for serious work, there is no plastic fascia to be found anywhere. It is made from metal and metal only. Once again, Nexcopy did manage to sneak in some pizazz by having the front’s company logo be CnC’ed milled out. This allows air to be sucked in from the front (as well as the sides through copious amounts of air holes), flow over the internals, and then be exhausted out the back of the case via the rear fan. This is a great example of form and function done properly.
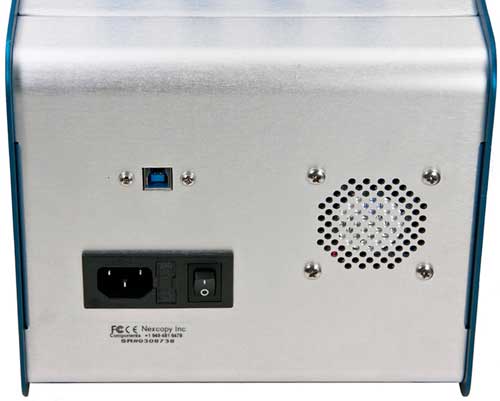
With the exception of the top ports, the only other ports on the USB 3.0 flash drive duplicator are on the back. This consists of the power plug outlet (with replaceable amp); a power switch; a USB 3.0 female-B port; and a small fan.
Getting the Duplicator Ready
Installing the Nexcopy USB 3.0 duplicator is not what I would call a difficult proposal, as there are three steps that need to be done in the correct order to get this device up and running. The first step involves downloading the latest version of the software (even though it is included it is always best to check and get the latest from the manufacturer’s website) and installing it. While the installation manual states registry editing is needed, I have been told by Nexcopy that this is not the case anymore and will be removed from the manual at some point.
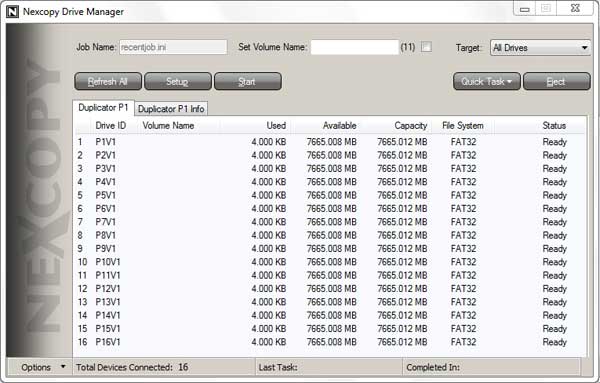
With the software installed, you then plug in the small plastic green dongle which is in fact an authentication dongle. Once that is plugged in recognized, you can then power up and plug in the duplicator itself. As long as you do not try to plug it into a USB hub and instead plug the USB 3.0 cable directly into your USB 3.0 port, you will be fine. Plug in as many of the flash drives as you want (up to 16) into the ports on the top of the device and away you go.
Duplicator Performance
To start the testing phase out, I went with a pretty simple and straight Windows 7 64-bit USB installation drive. On average, I can setup one of these drives in about 5 minutes by doing it the old-fashioned way. The process involves first making the USB flash drive bootable (via bootsec) and then copying the contents of a Windows 7 folder residing on my Seagate 2TB XT internal drive to the flash drive. It’s pretty simple and straightforward process, but one that becomes extremely tedious if you were to make up a batch of them.
I first made an image file of my minted Windows 7 64-bit installation flash drive using the included basic software. (As a note, a professional version or upgraded version of the software includes the ability to write-protect drives, partition drives or set them as CD-ROM devices.) When that was completed, I set up a new batch job; pointed the software at the location of the newly created .IMG file on my hard drive; and then took the 30 or seconds to plug in all 16 flash drives, and got down to business. With about another 30 seconds of work, I had set in motion a 16-way duplication process. I then sat back and waited. In grand total, it took a bit over 11 minutes from the moment I started the copy process (not including image file creation) to the moment I had 16 USB drives imaged. This isn’t too shabby considering it’s a total of 128GB of data, but I was expecting better performance.
Since this process took longer than expected, I went back to the drawing board to figure out what the problem was. This is not to say the results were bad. It’s still much, much faster than plugging in a bunch of flash drives to USB 3.0 hubs and manually doing it (as you would also need use either an SSD or RAID-0 array capable of pushing about 200MB/s to equal the SSUSB160PC’s speed). The most likely cause turned out to be the performance bottleneck: the supplied Super Talent flash drives for this testing and review. If you want even better results, it’s a good idea to invest in higher-end USB 3.0 flash drives.
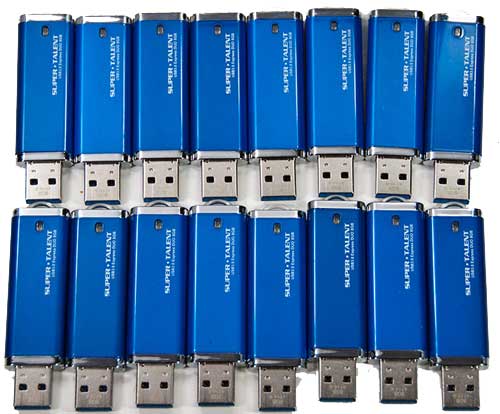
Lots of USB 3.0 flash drives here…
My next test was a more mundane test in that I simply used it to copy 7.5GB of data from a folder on my hard drive to 16 flash drives. Once again, it took about 30 seconds to plug them all in, and about another 30 seconds to configure the setup (and save as another task). In the end, the Nexcopy duplicator allowed me to complete this task about thirteen times faster than doing it manually.
Recap
The Nexcopy USB 3.0 duplicator really is a force multiplier and the more you use it for the same task the faster the process will get. After all, a good portion of the time it took in testing was the setup phase. Once that is taken care of, the USB 3.0 duplicator can churn out 16 flash drives with custom images about as fast as you would like. The faster those flash drives, the faster they will complete their task. In other words, if time is money, then the SSUSB160PC is a veritable money printing machine.
There are a couple of caveats worth pointing out. First of all, while the price ($1,499) is very reasonable for its niche, it is still going to take a lot of flash drives to make it worth your while. In this depressed economy, manual labor is cheap and tech-savvy individuals are a dime a dozen. This to be honest is a non-issue as after a certain point it, just makes more sense economically to have a duplicator than using a person. If you don’t know you need that many flash drives, then a duplicator is simply not what you need. For everyone else, the more you use them, the more they not only pay for themselves but actually save you money.
Nexcopy Duplicators on Amazon
Nexcopy manufactures a variety of PC-based and standalone USB duplicator solutions.
PC based systems support advanced USB functions such as write protection, CD-ROM partition and multi-partition creation, while standalone systems are ultra-fast, high speed USB copiers duplicating gigabytes of data quickly and accurately.

May I clone USB3 HDD with it ?